

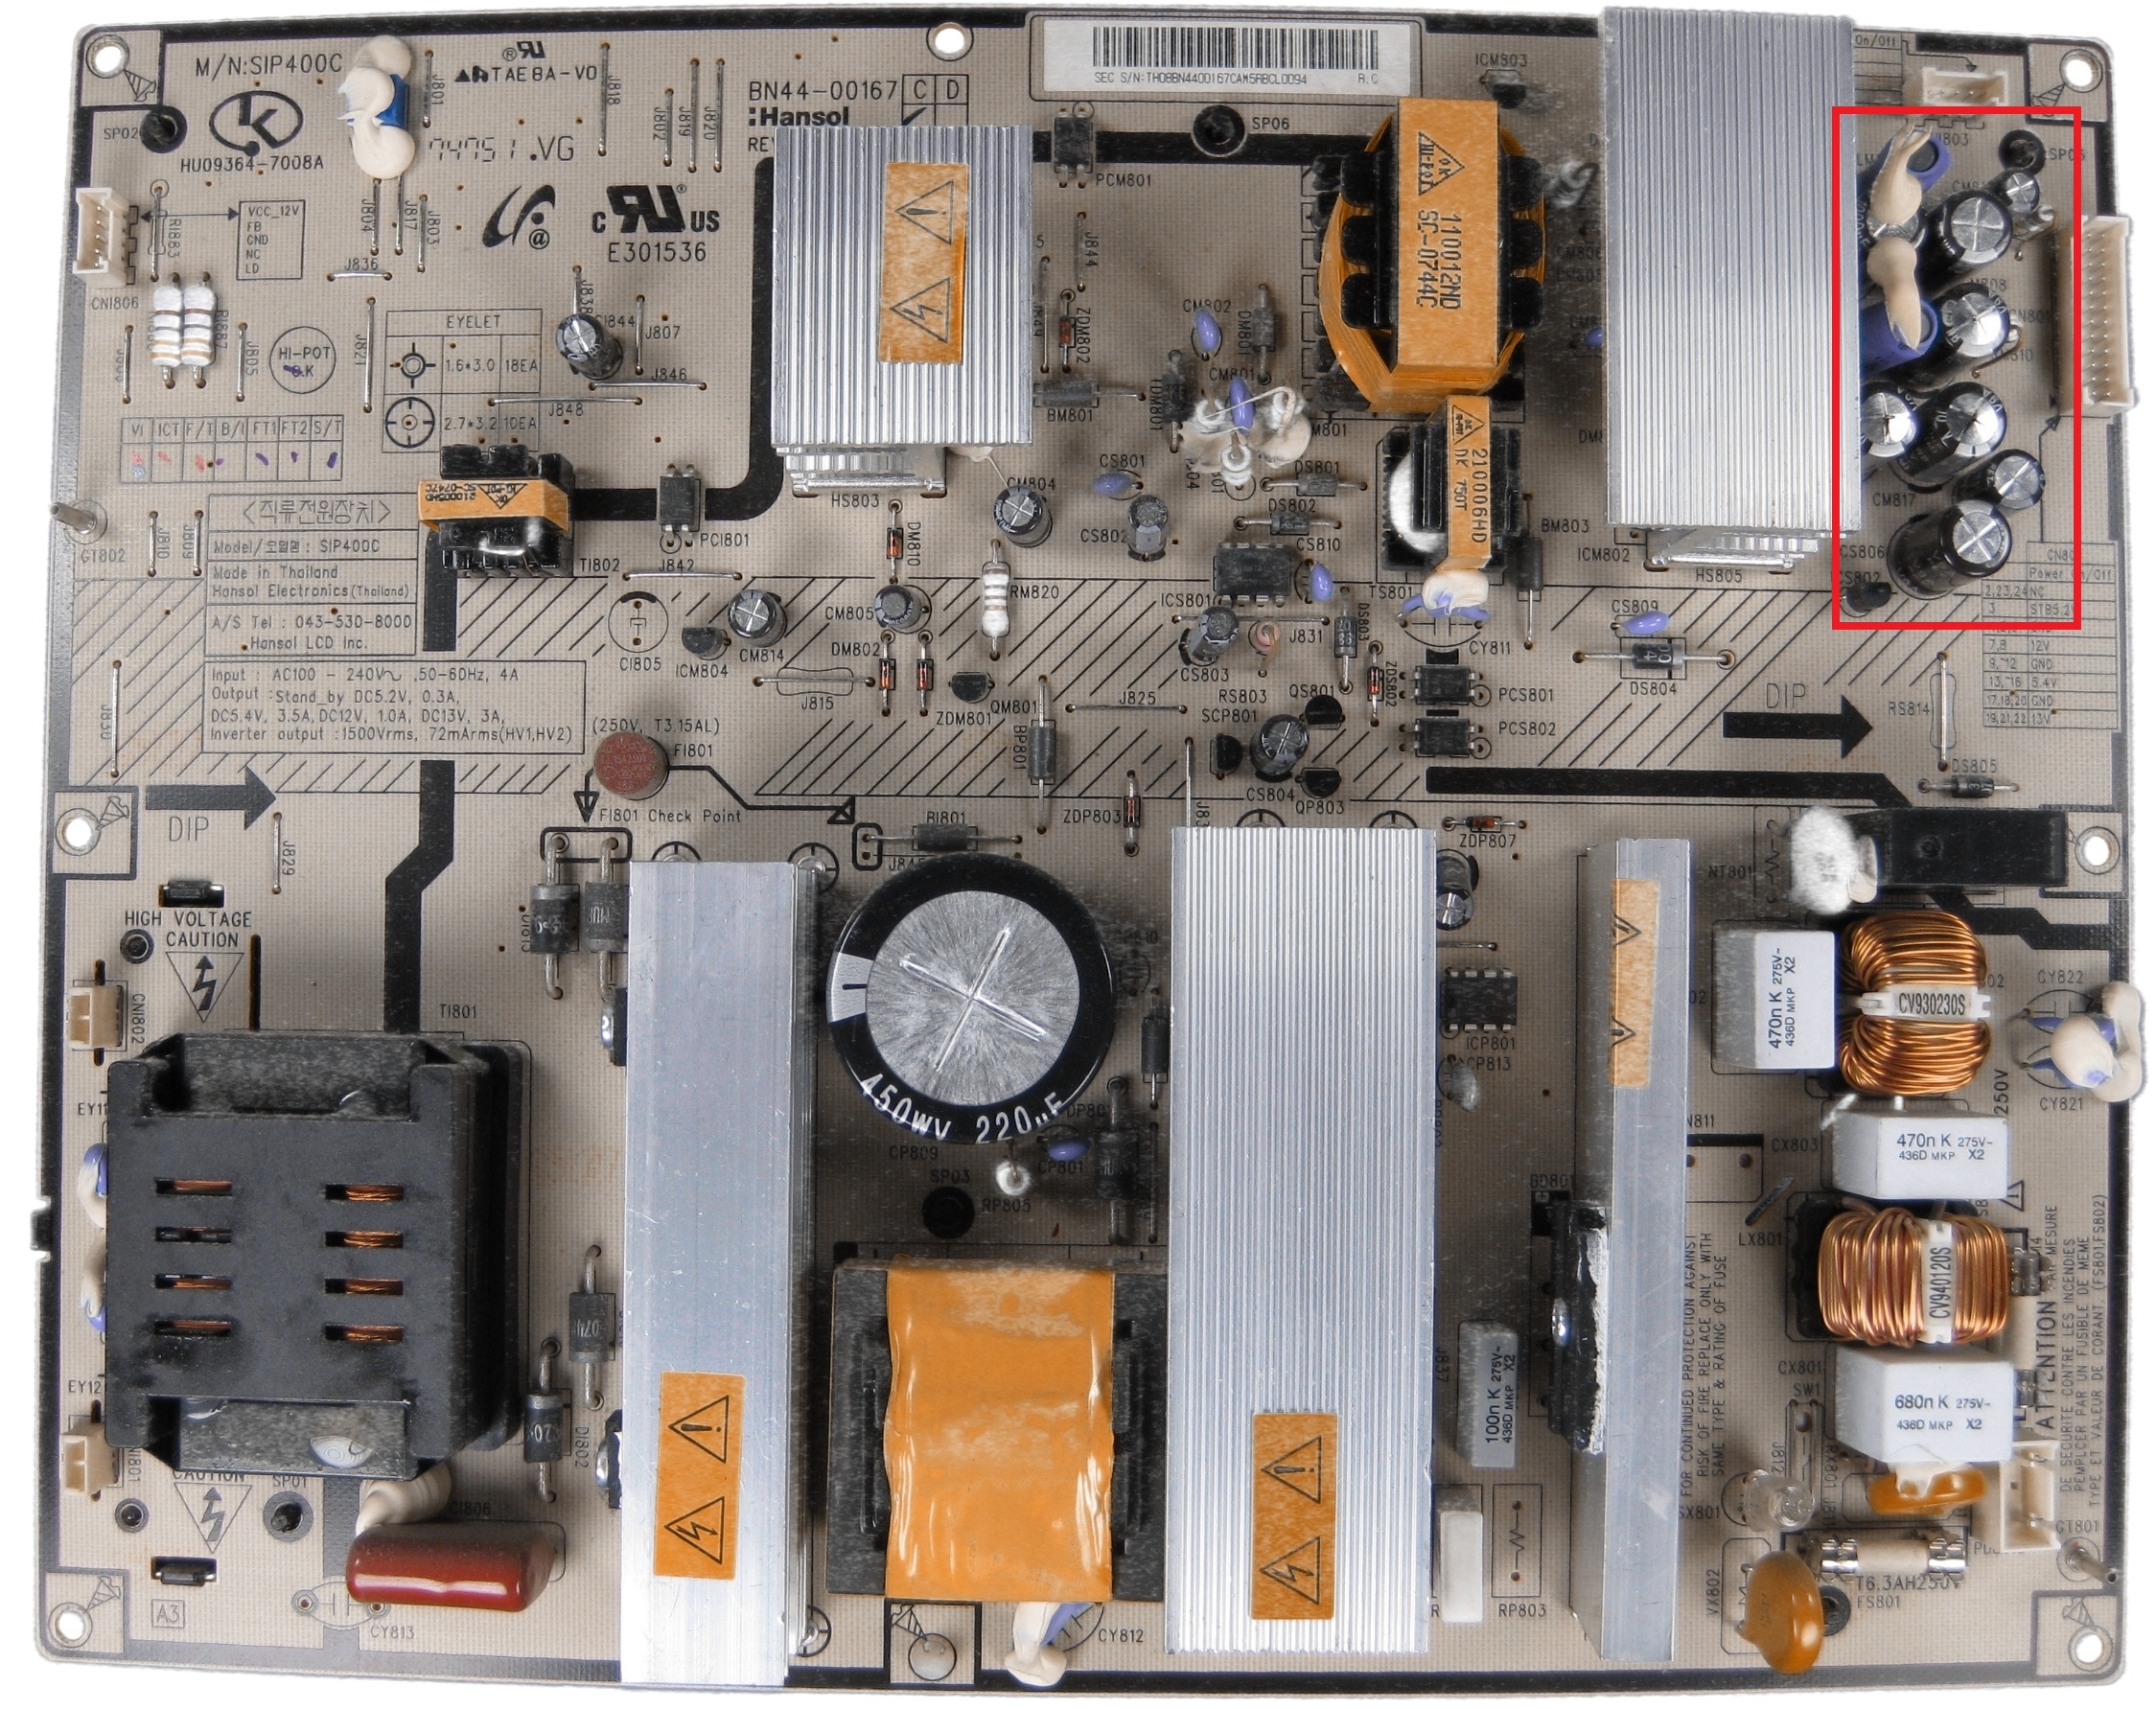
Capacitors can look normal and still be bad. If you are interested in reading about this subject, Google “ESR” and you should find hours of reading. The capacitors boxed in red are those capacitors included in the LCDalternatives repair kit.
While still mounted inside the TV, you can see some bulged capacitors on the board. Upon seeing this, you should celebrate as a successful repair is almost assured.
There are several wires and cables that must be disconnected from the board before it can be removed from the TV. Take note of how the wires on the left side of the board are connected.
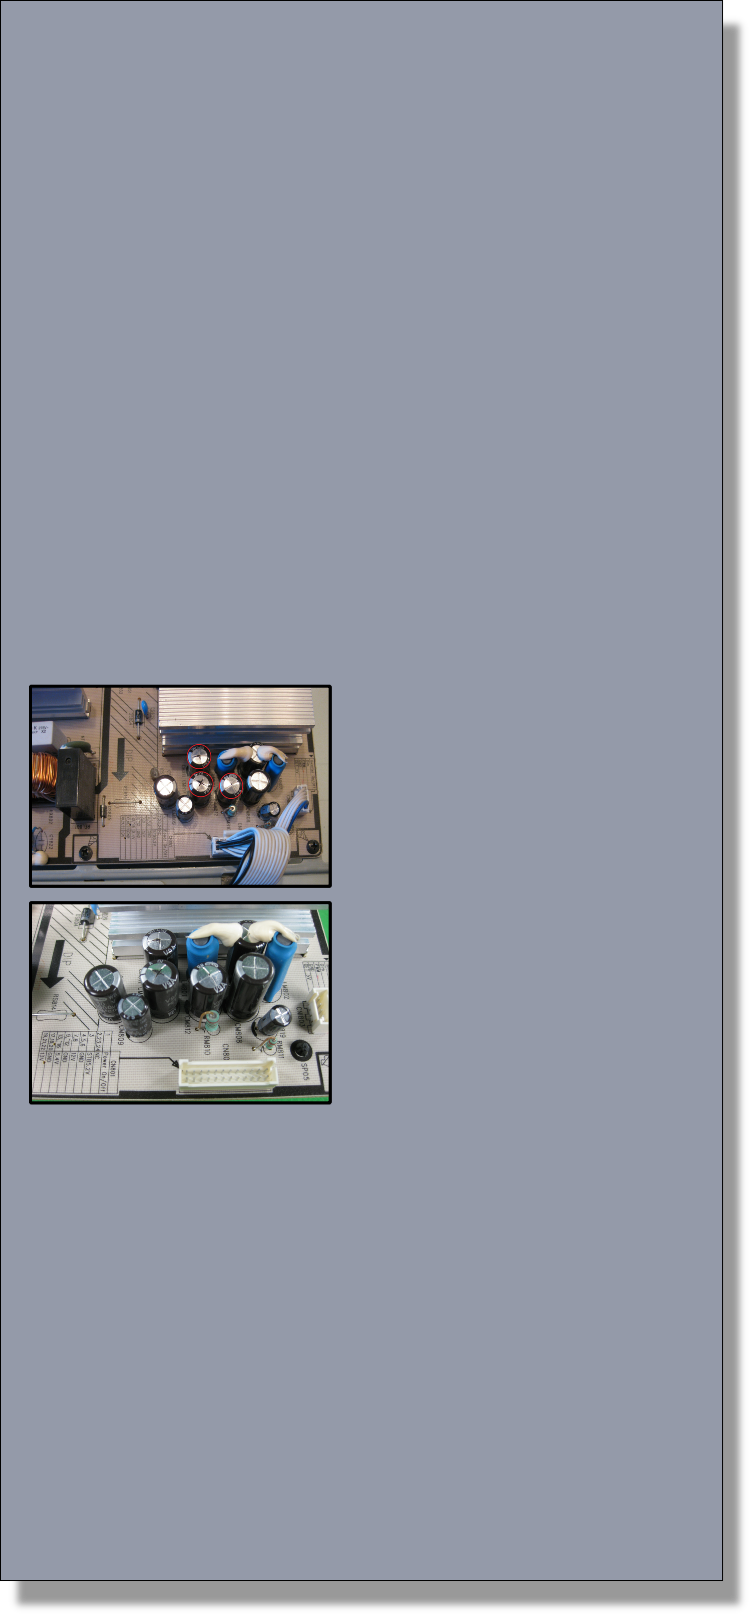
Here’s a closer look at the capacitors. As you can see, the three capacitors that are circled in red are obviously bulged out on top. The others appear normal. The black substance seen on the tops of the capacitors is some of the fluid contained within the capacitor. The white substance on top of the blue objects is only epoxy.
Here is another view of the capacitors.
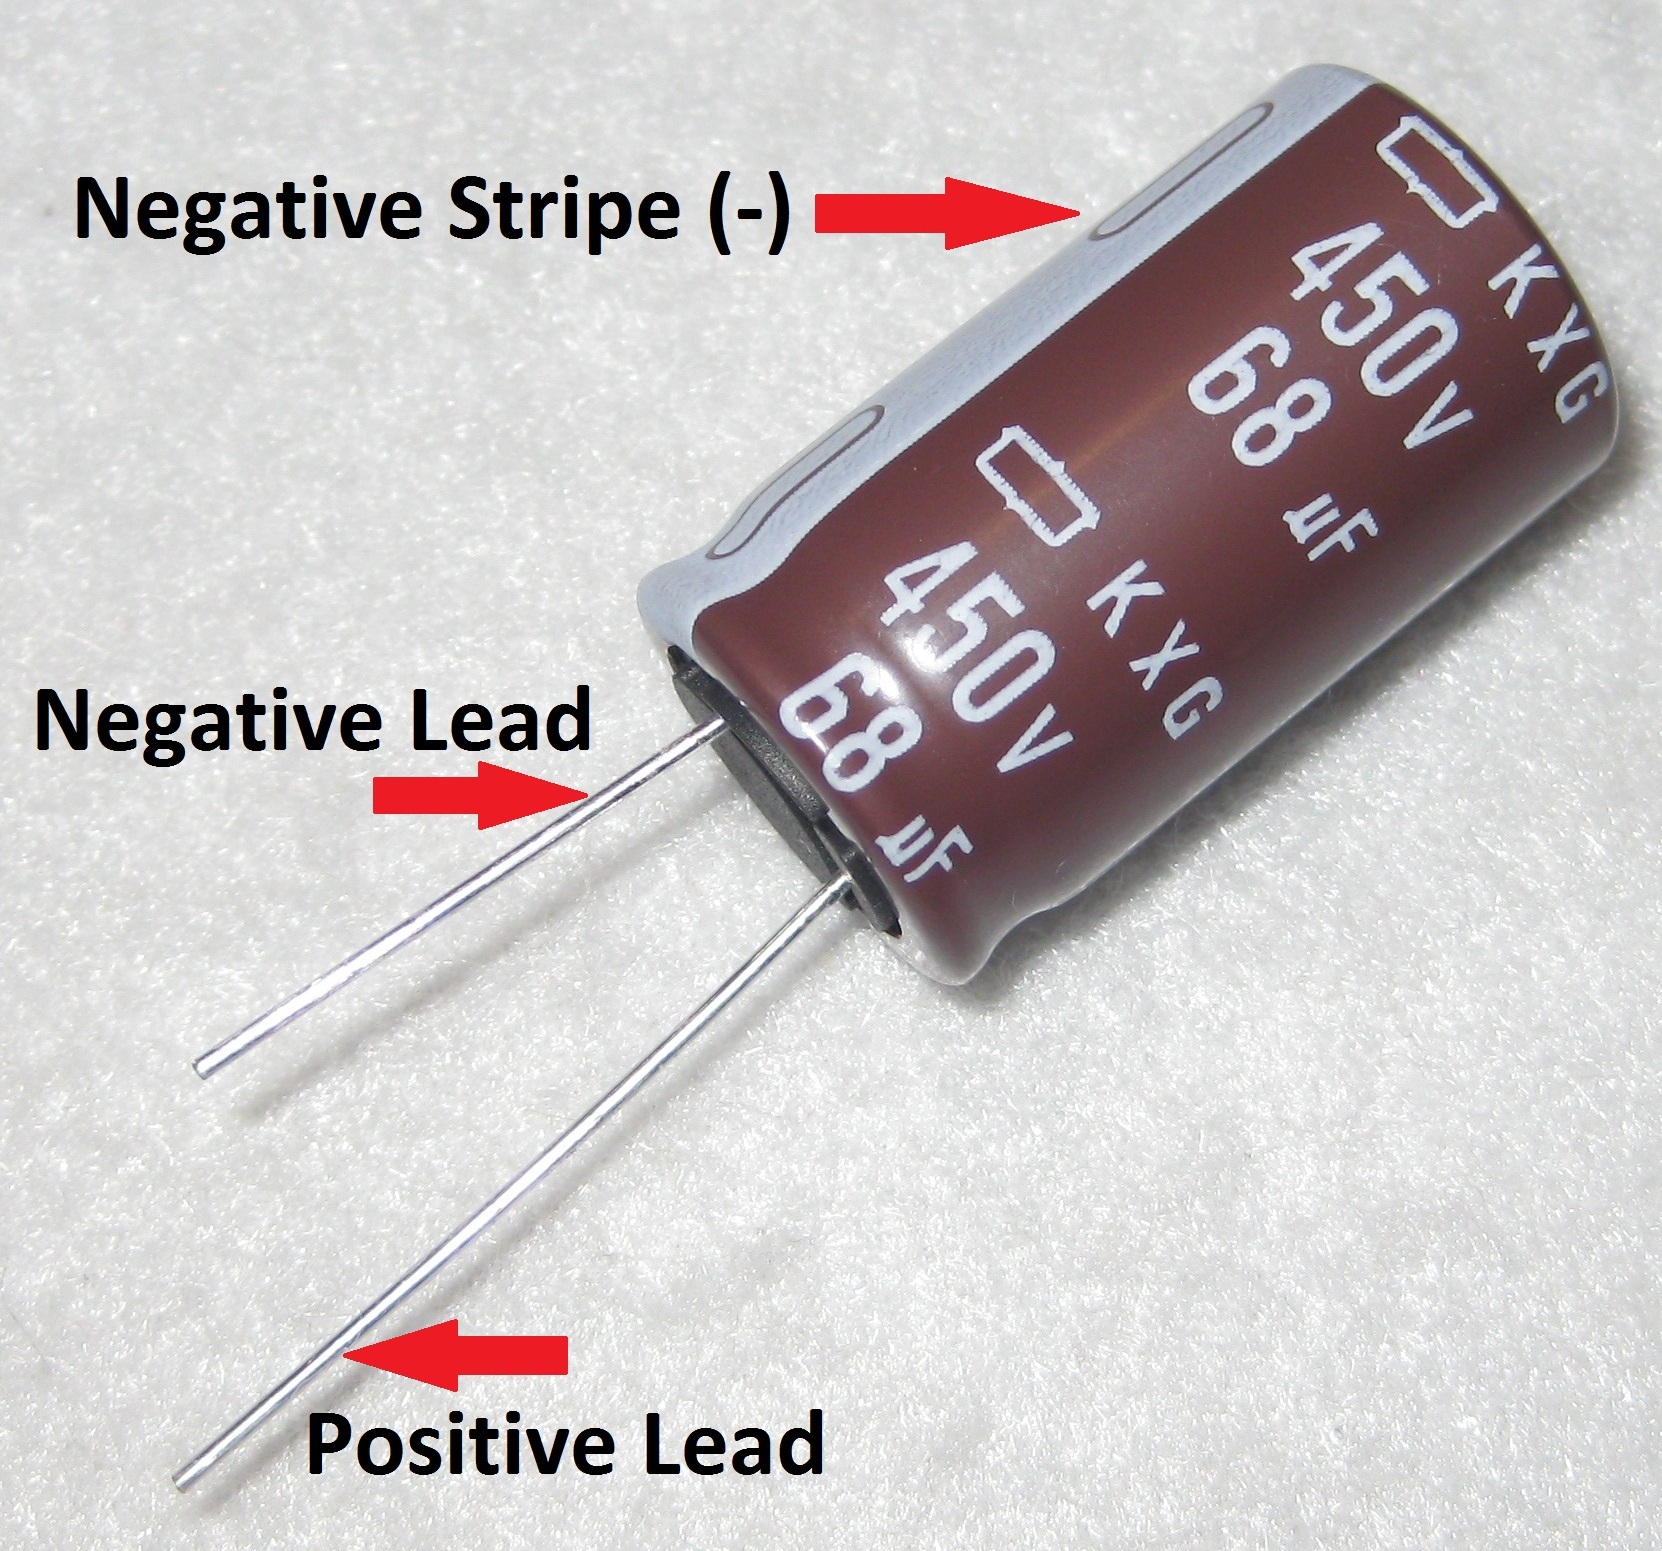
The most important thing to remember before soldering, is to verify that the polarity is correct. Capacitors have positive and negative leads. Ensure the capacitors are replaced observing correct polarity. The board should be plainly marked as are the capacitors with respect to polarity.
Here is a little video showing how to solder the capacitors in. The soldering iron used here is one we carry at LCDalternatives. It is a 120v 60w soldering iron. For further information regarding this soldering iron, click HERE. After soldering in the capacitors, you’re almost finished.